Tuesday, October 2, 2012

Change USB Drive Default Icon!


Have you ever wanted to change your pen drive or any removable drive icon and failed.Then you are at the right place and applying below steps you will succeed. Now let's do

1. Open notepad and Copy-paste the below code in your Notepad:

[autorun]
Icon=img.ico

Replace the img.ico with the name of the icon which you are going replace with the default one.


2. Now, save this notepad file as autorun.inf in the root of USB drive.


3. Paste the new image file in the root of USB drive.


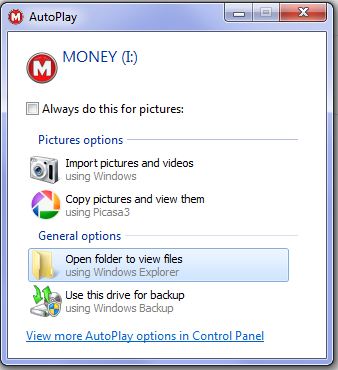
4. Safely remove the USB drive and reinsert the drive to view a new icon.


Have fun!!!!!!!!1

Monday, September 10, 2012

Compile and Run C/C++ programs in visual studio!


If you ever wished to run a c/c++ program in visual studio then your wish can become true.Here I will tell you step by step process of compiling and running c/c++ programs in visual studio.
But before that I would like to discuss some advantages of writing a c/c++ program in visual studio.

1.Main advantage is that using visual studio you can write a c/c++ program in window 7 in which most of the other compiler like turbo c does not work.

2.It also supports 64 bit window.

3.If you are already using visual studio then why not to use it.

4.We can create multiple c/c++ files under single project.

Now let’s come on the main topic ‘steps for writing c/c++ program inb visual studio”.

1.Goto File =>New => Project.

2. A new project window will open.In this window under project types section
            Goto Other Languages =>Visual C++=>Win32
Now in template select win32 console application.

3.Enter the name of the project ,specify a location for your project directory and click ok.

4.Now win32 application wizard will open.Click next for application setting.In application setting
            a)uncheck precompiled header.
            b)check empty project.
            c)check console application if unchecked.
            d)click finsh.

5.A new project will be created. Now in solution explorer right click on source file and goto add=>new item.

6.Add new item window will open.In this window select c++(.cpp).

7.Enter the name of file and click add.

8.A c++ file will be created.Now you want a c file then rename this file to *.c.
The default here will be a file with a *.cpp extension (for a C++ file). After creating the file, save it as a *.c file.

Steps to compile and run:

1.   Press the green play button in toolbar.

2.   By default, you will be running in debug mode and it will run your code and bring up the command window.
To prevent the command window from closing as soon as the program finishes execution, add the following line to the end of your main function:
 
getchar();
This library function waits for any input key, and will therefore keep your console window open until a key is pressed.

Hope this post helped you! Join us on Facebook.

Monday, August 13, 2012

Browse through MS Calculator in XP!!!!!!


Now access the internet via your standard Microsoft Calculator using this trick.
You can do this for fun or when your browser is messed up for some unexplainable reason.

Steps:

1. Open your MS Calculator. 

                  Start => All Programs => Accessories => Calculator.

2. Open the help-window by pressing the F1 key or clicking on help button .

3. Click the top-left corner icon of the help window once .

4. Select 'Jump to URL'.

5. Type your address into the avaliable field, but remember to type http:// before www


Have fun !!!
Now access the internet via your standard Microsoft Calculator using this trick.
You can do this for fun or when your browser is messed up for some unexplainable reason.

Steps:

1. Open your MS Calculator. This is normally found in Start => All Programs => Accessories => Calculator.

2. Open the help-window by pressing the F1 key.

3. Click the top-left corner icon of the help window once (Standard is a Document with a Questionmark).

4. Select 'Jump to URL'.

5. Type your address into the avaliable field, but remember to type http://, and not just www. (or equivalent).

enjoy the trick1

Friday, June 29, 2012

Basic tips for web designs


    Graphics

  1. Think small
  2. , like 10-12KB per image. Yes, depending on the source, the number of broadband users is going up. But slow pages are still really annoying, even if you're on a T1. And huge images are a primary cause of slow pages. It's easy to optimize your images.
  1. Always use graphics that fit the content. Just because you have an adorable photo of your dog doesn't mean you should have it on your Web site about Web Design (sorry, Shasta...). The main exception I would make to this is for "design" images. These are photos or graphics that help make up the design of the page, and are not intended to illustrate the content.
  1. Do not use images that blink
  2.  or move or change or rotate or flash or do anything on your page. Or use them sparingly. There have been many studies that show that flashing graphics are distracting and annoying to people. In fact, in one focus group I watched the browsers actually physically cover up flashing graphics so that they could read the rest of the page.

Layout

  1. Stick with standard layouts
  2. . I've seen some pages that use 6 or 8 frames on one page. Another site used a layout where you had to scroll to the right to read everything on the page (but you never had to scroll down). These layouts are cute, and you might find them fun to build, but they will drive your readers nuts. The reason that the 3-column layout is so popular on Web sites and newspapers is because it works. You might think it's boring, but you'll keep more readers if you stick with something simple that they can understand.
  1. Whitespace is more than the CSS property, it is a function of your layout. You should be aware of the whitespace on your pages and how it affects how the content is viewed.Whitespace is just as important in a Web layout as it is in a paper layout.
  1. Use your graphics as elements in your layouts
  2. . Graphics can be more than just graphics when you use them as actual elements in your layouts. An extreme example is when youwrap text around an image, but any image you have on your site is a layout element and should be treated as such.

Fonts

  1. Serif for headlines and Sans-Serif for text
  2. . If you've taken any type of print design, this might be exactly the opposite of what you were taught. But the Web is not print. Sans-serif fonts are much easier to read on computer monitors because the screen resolution is not as high as in print. If you use serif fonts for normal text, the serifs can blur together on the screen making them hard to read. Your printer friendly page should use the opposite fonts (serif for headlines and sans-serif for text).
  1. Limit the number of different fonts
  2. . One of the best ways to make your Web site look amateurish is to change the font over and over. Sure, it's possible to do, but limiting your page and site to 2 or possibly 3 standard font families is easier to read and looks more professional.
  1. Use standard font families
  2. . Yes, you can choose to use "Rockwood LT Standard" as your font on your page, but the chances that one of your readers will have that font as well is pretty low. Sticking with fonts like Verdana, Geneva, Arial, and Helvetica may seem boring, but your pages will look better and the designs look correct on more browsers.

Advertising

  1. Don't be greedy
  2. . If you have any control over the number of ads on your site, be aware that your readers are not coming to read the ads, they are coming for the content. If the ads overwhelm the page content, many readers won't stick around long enough to read your purple prose. Yes, it's important to make money from your Web site, but if your ads drive people away, you'll ultimately lose money.
  1. Treat ads as you would any other image
  2. . Keep them small, avoid blinking/flashing, and keep them relevant. Just because you can have an ad on your site, doesn't mean that you should. If the content is relevant to your readers, they're more likely to click on the ad.

Remember Your Readers

  1. Test your pages in multiple browsers
  2. . Writing Web pages that work only on the most modern browser is both stupid and annoying. Unless you are writing a Web site for a corporate intranet or a kiosk where the browser version is completely fixed, you'll have problems with people not being able to view your pages.
  1. The same is true for operating systems
  2. . You can't assume that just because your page works in IE5.0 for Windows it will work in IE5.0 for Macintosh.
  1. Write content that they want
  2. . Unless you're writing a site purely for yourself (and if you are, why is it posted to the Web?), make sure that your content covers topics that your readers want to read.

Tuesday, June 12, 2012

Block Ads In Chrome


Blocking ads in Chrome is just easy. AdBlock for Chrome is plugin for this purpose. AdBlock is easier to setup; with AdBlock you do not need to select which filter's list to subscribe to - AdBlock automatically uses AdBlock's own filters and AdBlock Plus' EasyList. So, to use AdBlock all you need to do is install it - it will start blocking ads instantly requiring little to no assistance from you.
Most other features present in AdBlock are:
  • Users can exclude sites from being blocked (press Ctrl + Shift + L when surfing the website you want to exclude):
  • Users can manually block an ad AdBlock missed (press Ctrl + Shift + K when surfing the website with the ad you want to block):
  • Users can manually change which filters are being used:
Unfortunately AdBlock does not have an easy way to remove false positives like AdBlock Plus does (as far as I can tell). Also, whereas AdBlock Plus fully stopped ads from being downloaded, because of the restrictions of Chrome, some ads are blocked by AdBlock after they have been downloaded as opposed to being blocked from being downloaded.

Twitter Delicious Facebook Digg Stumbleupon Favorites More

 
Design by Free WordPress Themes | Bloggerized by Lasantha - Premium Blogger Themes | Affiliate Network Reviews